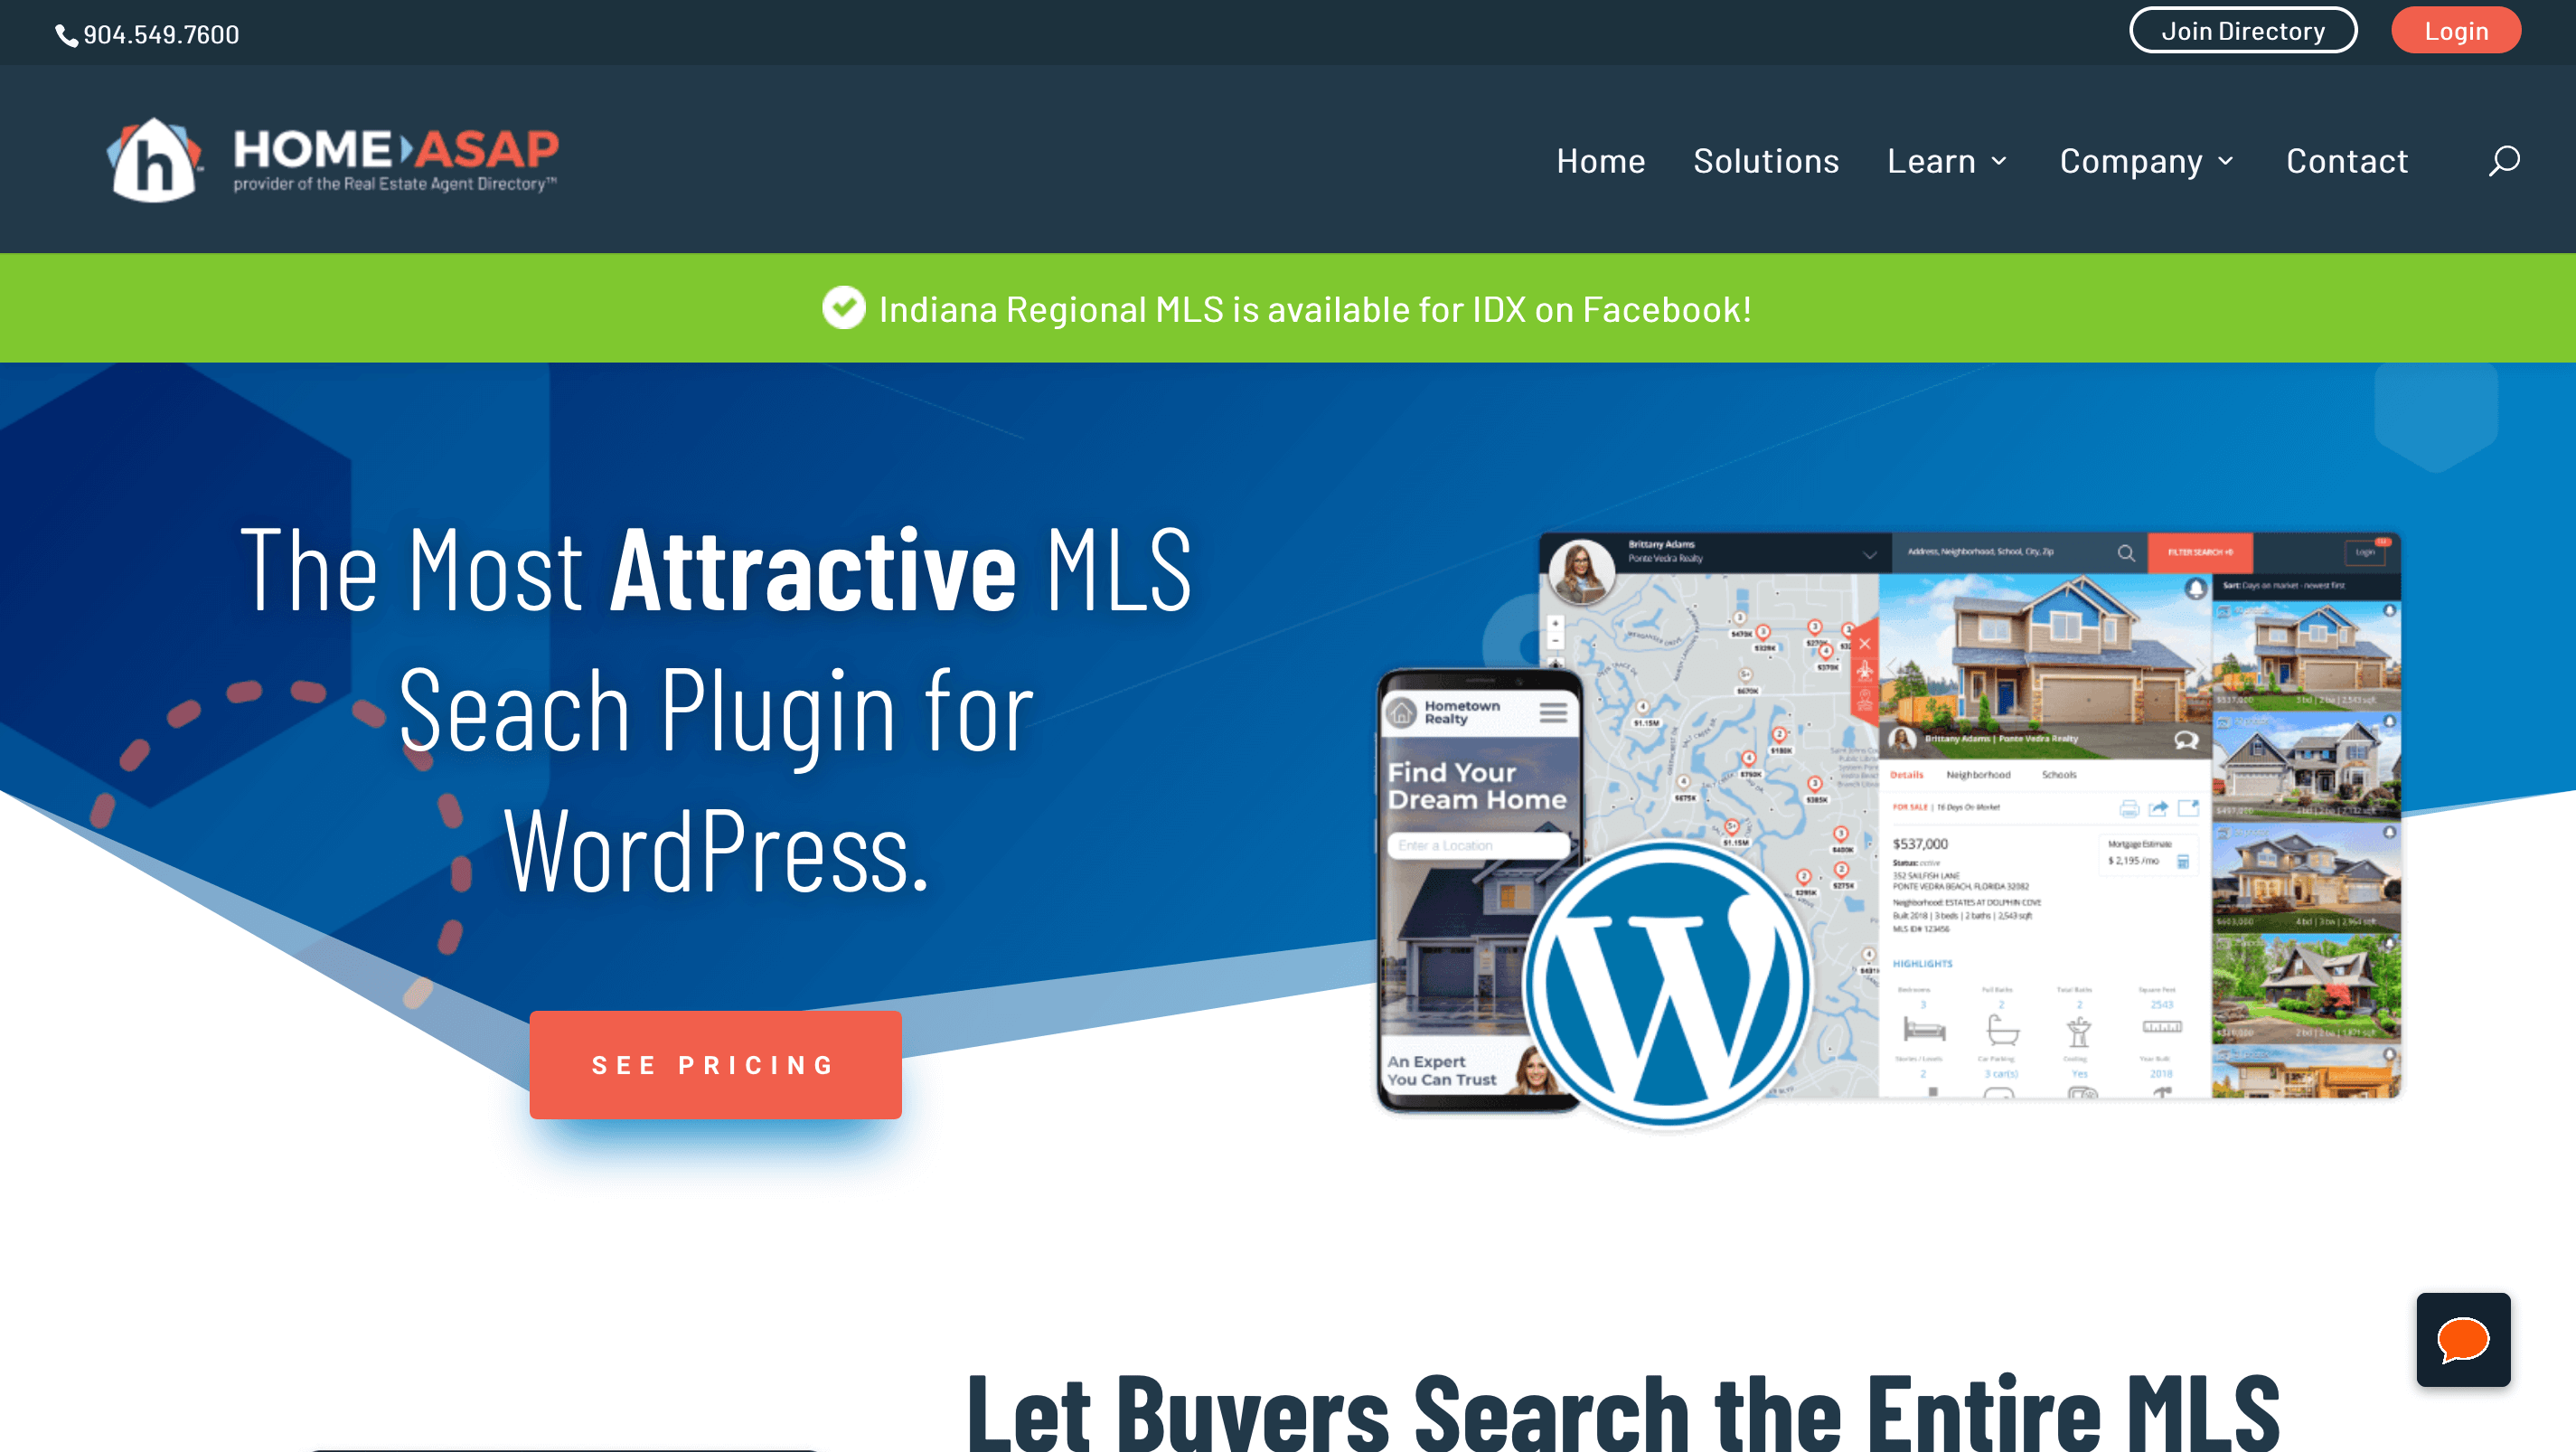
Welcome to the IDX Home Search – Help Center
HAVE QUESTIONS? WE CAN HELP!
Here you’ll find all our information resources to help you best use My IDX Home Search plugin by Home ASAP. Still stuck? Feel free to e-mail us or call (904) 549-7600!
Installing the My IDX Home Search Plugin
(Desktop computer recommended for this process.)
My IDX Home Search has been designed to be used on websites that run on WordPress. To complete installation you will need to have admin access to your WordPress dashboard.
Standard Installation
- Log in to the WordPress dashboard for your website. This will usually be the site URL followed by /wp-admin.
Example: yoursite.com/wp-admin
- In the sidebar menu, click on “Plugins.” For most users, this should be located on the left side of the screen.
- Next, click the “Add New” button near the top of the page.
- A search field should appear. Enter “My IDX Home Search” into the search field and click search.
- Find “My IDX Home Search” in the list of search results and click the “Install” button located in the appropriate box.
- The “Install Now” button from the previous step will change to say “Activate.” Click the “Activate” button. Now you’re ready to begin set up (See “Set Up Guide” below).
Example: yoursite.com/wp-admin
My IDX Home Search Installation from HomeASAP on Vimeo.
Standard Installation
- Download the plugin file here. Do not unzip it.
- Log in to the WordPress dashboard for your website. This will usually be the site URL followed by /wp-admin.
Example: yoursite.com/wp-admin
- In the sidebar menu, click on “Plugins.” For most users, this should be located on the left side of the screen.
- Next, click the “Add New” button near the top of the page.
- Next, click the “Upload Plugin” button near the top of the page and choose the zip file you just downloaded.
- Find “My IDX Home Search” in the list of installed plugins and click “Activate.” Now you’re ready to begin set up (See “Set Up Guide” below).
Example: yoursite.com/wp-admin
SETUP GUIDE
(Desktop computer recommended for this process.)
My IDX Home Search for WordPress requires an IDX Home Search subscription to function properly. After purchasing and activating an IDX Home Search subscription, visit the plugins settings page in your WordPress dashboard to complete set-up. Here’s an overview of set-up, so you know what to expect.
- 1. Purchase an IDX Home Search Subscription
- 2. Set Your Options
- 3. Copy the Generated Shortcode
- 4. Place Your Shortcode on the Page
Purchase an IDX Home Search Subscription
If the agent already has an existing IDX Home Search or My IDX Home Search subscription, proceed to step 2.
First, the agent will need to purchase a subscription to IDX Home Search and complete the set-up process for that subscription. This typically involves getting the agent’s and broker’s signatures, and may vary depending on the MLS.
Purchase subscription to IDX Home Search.
Set My IDX Options
Once the agent has purchased and completed the approval process, you’re ready to start setting up My IDX Home Search.
On the plug-in settings page, you will find a builder that generates a shortcode that lets you place your search on any page of your website. You can get to the plug-in settings by navigating to the WordPress dashboard for your website and hovering over Settings in the sidebar menu. Then choose “My IDX Home Search” from the flyout menu.
Choose an Embed Option
My IDX Home Search lets you add a home search to a page in two different ways:
- Embed Searchbox– This option will place only the search input on the page. This works best for pages where you want to have full control of the page appearance.
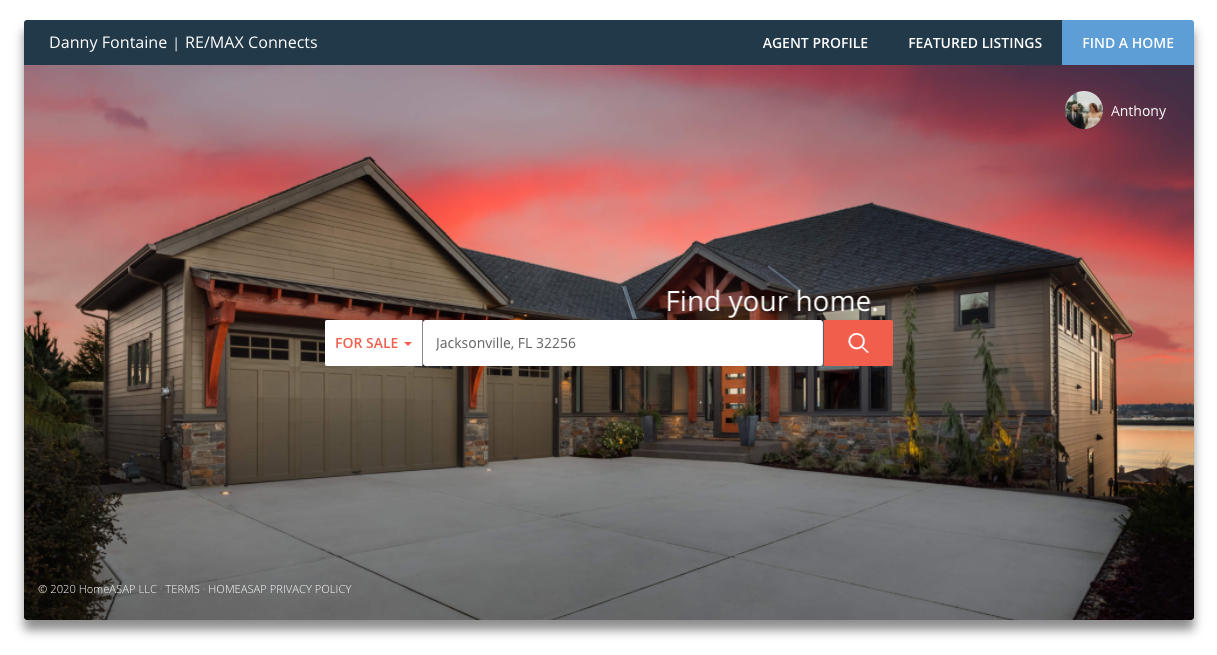
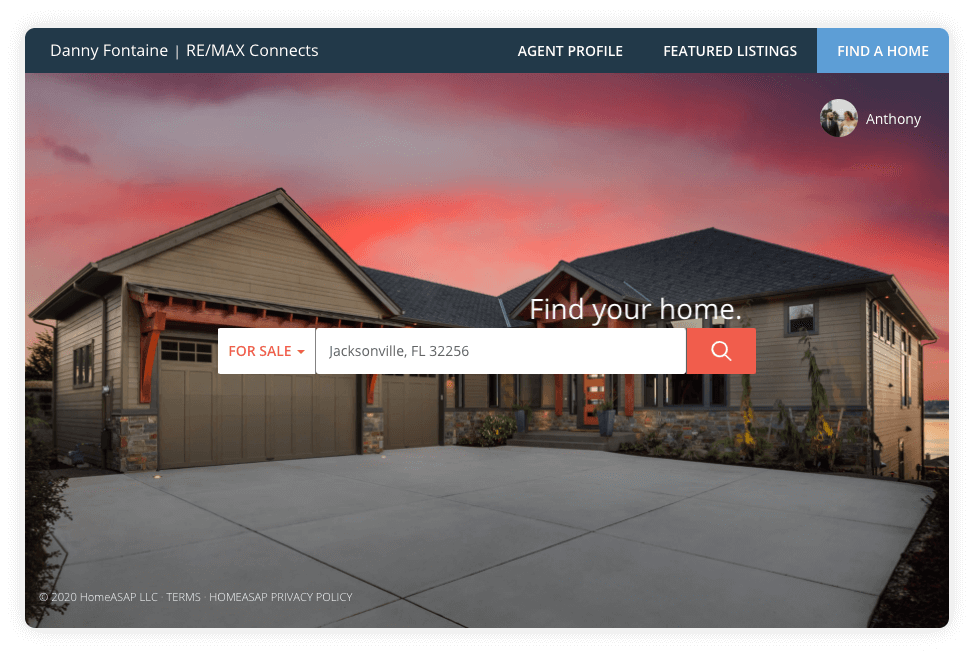
- Embed Landing Page– This option will place iFrame element that loads the default IDX Home Search landing page within your webpage. This works best for pages where you want to create a polished page quickly.
When you choose an embed option, the rest of the available options should appear below. This is because the embed options use different shortcodes with two different sets of customization options available.
Agent
Required for both Searchbox and Landing Page embeds.
Type the agent’s name in the search input labeled, “Search for Yourself.” Then click the agent’s name in the auto-populated list.

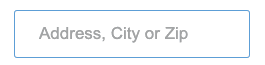
Placeholder Text
Available for Searchbox embeds only.
This setting lets you customize the placeholder text that displays inside of the searchbox. This setting is optional and if left blank, it will default to “Address, Zip, City, State.”

Search Results
Available for Searchbox embeds only.
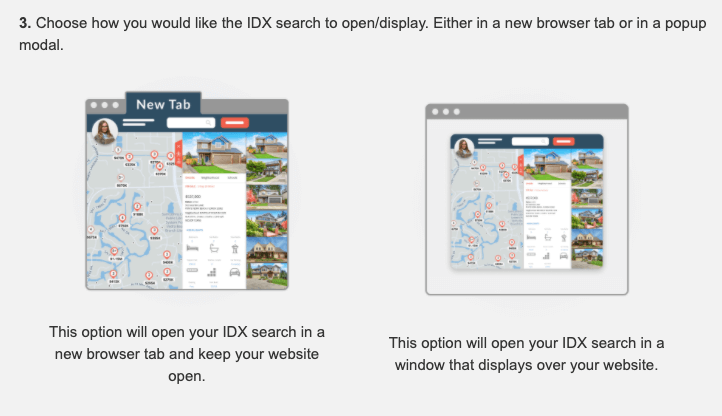
When embedding the searchbox only, you can choose whether the users search results open in a new tab or in a pop-up window on the same page.
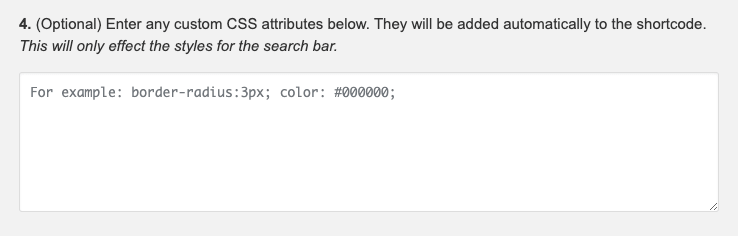
Custom CSS
Available for both Searchbox and Landing Page embeds.
Custom CSS allows you to change some aspects of the appearance My IDX Home Search when displayed for your visitors. This setting is intended mainly for advanced users and is completely optional.
When adding custom CSS, you should include the property name followed by a colon followed by an acceptable value. No CSS selectors are needed, and you can add multiple CSS rules as long as each rule is separated by a semi-colon. You can read more about CSS here.
When embedding the Searchbox only, Custom CSS rules are applied to the search input element.
When embedding the Landing Page, Custom CSS rules are applied to the iFrame element that contains the landing page. Elements within the landing page such as text and images cannot be modified.
Height
Available for Landing Page embeds only.
Height controls how much vertical space is used the iFrame element containing landing page. When setting the height, be sure to include both a number and unit with no space between. The default height is set to 600px.

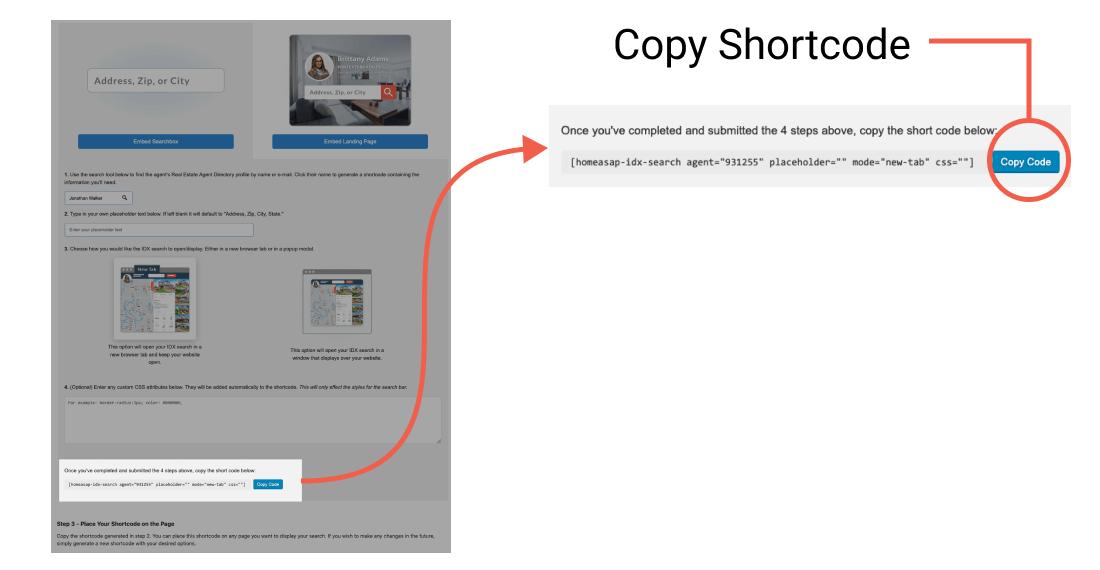
Copy the Generated Shortcode
Once you’ve set your desired options, a shortcode will automatically be generated. Simply click the “Copy Code” button to copy the shortcode to the computer’s clipboard.
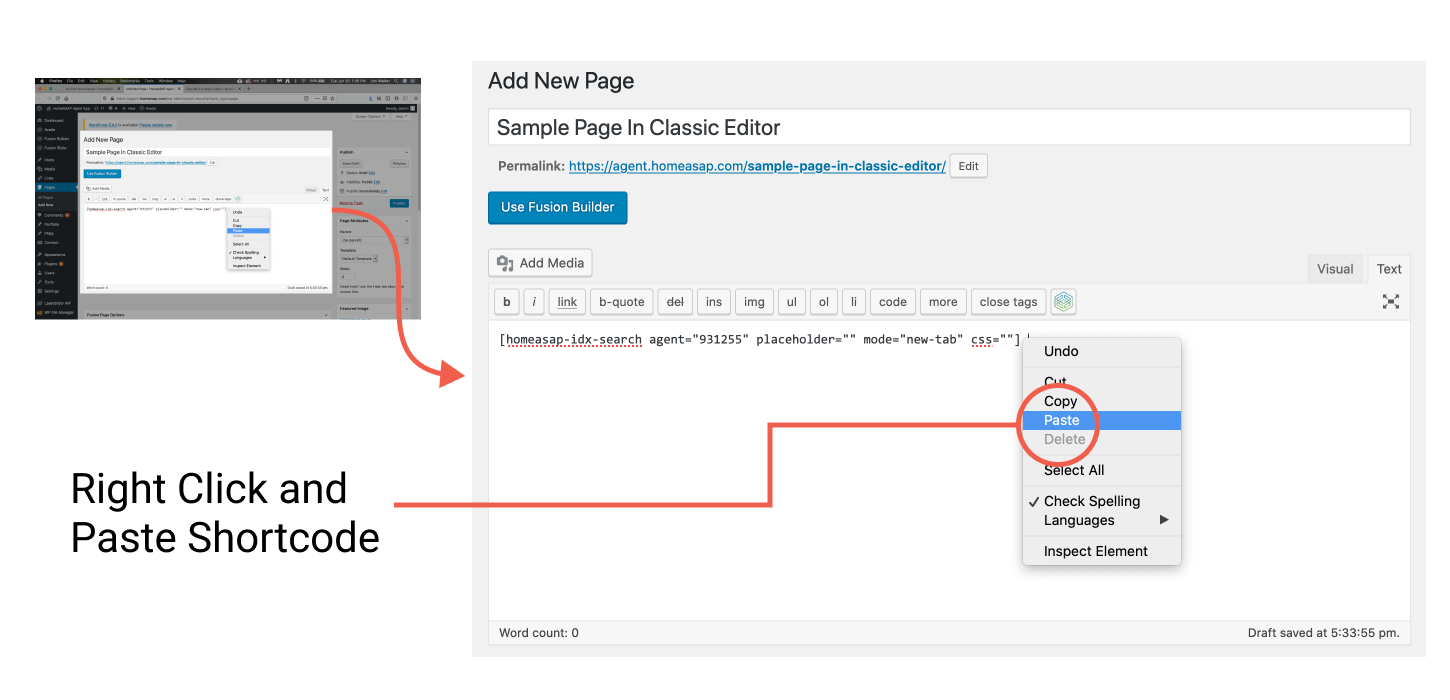
Place Your Shortcode on the Page
Last of all, you’ll need to add the shortcode you copied in the previous step to the page where you’d like the home search to appear. Edit the page you where you want to place the home search, then paste the shortcode in the desired place on the page.
Tip: Leave the My IDX settings page open in a different tab in case you need to recopy the shortcode.
COPY / PASTE CSS CODE
Use the snippets below in the CSS field of the My IDX settings to create a custom look. You can explore even more customizations on our CodePen page.
Searchbox (Soft Shadow)
The code below will give you the look shown if copy/pasted into the Custom CSS text area when building your shortcode. (This has a smaller border-radius for slightly sharper corners and a soft shadow to give a subtle lift off the page.)
Example: width: 300px; display: block; margin: 60px auto; height: 48px; padding: 12px 24px; text-align: left; border-radius: 3px; border: 1px solid #5d9ed6;
Searchbox (Rounded Corners)
The code below will give you the look shown if copy/pasted into the Custom CSS text area when building your shortcode. (This has a larger border-radius for more rounded corners and a harder shadow to give the impression that the light is coming from above.)
Example: width: 400px; display: block; margin: 60px auto; height: 48px; padding: 12px 24px; text-align: left; border-radius: 35px; border: 1px solid #000000; box-shadow: 0 5px 10px rgba(0,0,0,.35); -webkit-box-shadow: 0 5px 10px rgba(0,0,0,.35); -moz-box-shadow: 0 5px 10px rgba(0,0,0,.35);

Landing Page (Soft Shadow)
The code below will give you the look shown if copy/pasted into the Custom CSS text area when building your shortcode. (This has a smaller border-radius for slightly sharper corners and a harder shadow to give the impression that the light is coming from above.)
Example: display:block; margin: 0px auto; border-radius: 3px; box-shadow: 0 10px 10px rgba(0,0,0,.35); -webkit-box-shadow: 0 10px 10px rgba(0,0,0,.35); -moz-box-shadow: 0 10px 10px rgba(0,0,0,.35);
Landing Page (Rounded Corners)
The code below will give you the look shown if copy/pasted into the Custom CSS text area when building your shortcode. (This has a larger border-radius for more rounded corners and a soft shadow to give a subtle lift off the page.)
Example: display:block; margin: 60px auto; border-radius: 10px; box-shadow: 0 0 20px rgba(0,0,0,.15); -webkit-box-shadow: 0 0 20px rgba(0,0,0,.15); -moz-box-shadow: 0 0 20px rgba(0,0,0,.15);
Want to see what else you can do?
Learn more CSS and styling options at the worlds biggest web developer site, w3schools
TROUBLESHOOTING
My agent profile is showing instead of a search landing page.
When you choose an agent that does not have an active IDX Home Search subscription tied to his or her account, the agent’s Real Estate Agent Directory (READ) profile will appear instead when you try to embed a search landing page. This can happen if the agent has not yet purchased and set up the subscription, as well. Many MLS’s require agents to go through an approval process before showing listings, as well.
In rare situations, the agent may also have multiple READ accounts, and the subscription may be tied to another one of an agent’s accounts. You can check for other READ accounts on the Settings page for the IDX Home Plugin in your WordPress dashboard. Log in to your WordPress page. Then hover over “Settings” on the left side of the screen and select “IDX Home Search.” Next, choose the “Embed Landing Page” option and the shortcode set-up form should appear. Type the agent’s name in search field where it says search for yourself.
If the agent’s name appears more than once in the auto-populated list, then the agent may have accidentally created multiple accounts or there may be multiple agents with the same name. Try selecting different accounts until you find the correct agent. You can verify you have selected the correct agent based on the contact information shown when you view the embedded page. If the agent has an active subscription, you should see the agent’s search landing page. Subscriptions can be purchased at https://about.homeasap.com/wordpress/idx-mls-check or by calling (904) 549-7616.
I can't find the agent in the agent search.
The IDX Home Search settings page includes a search tool that lets you easily generate a shortcode to display the IDX Home Search for a chosen agent. You can search for agents by name or e-mail. To generate the shortcode, click the agent’s name from the list that automatically appears when you type.
If the agent’s name does not appear, then the agent probably does not have a Real Estate Agent Directory account or the incorrect information has been provided. In this case, you will need to create a new account for the agent at https://dashboard.homeasap.com.
My MLS or Brokerage information has changed.
You can check the MLS info on file through the agent’s READ profile at https://dashboard.homeasap.com. Our team typically reaches out during the MLS approval process to verify MLS information, as well.
To change or update MLS or broker information, please e-mail us at [email protected].
Information on a property is incorrect.
IDX Home Search accesses listing information directly from the MLS using the Internet Data Exchange (IDX). In fact, our servers pull this info every 5 minutes to ensure the most accurate info possible.
If the information for a listing is incorrect, agents should first double the check info the information entered into the MLS itself.
If the info is correct on the MLS, you may have a plugin that has stored incorrect info. Caching plug-ins such as WP Super Cache or W3 Total Cache store static copies of web pages to improve performance. These plug-ins usually allow you to specify pages that should not be cached. Try excluding pages that contain the IDX Home Search shortcode.
Web browsers also store info on your computer so that it loads on return visits. Sometimes clearing this cache will fix the problem. You can learn about clearing your cache here.
If you continue to have issues, please reach out to us at [email protected].
I'm not receiving lead notifications.
When a person completes a lead form for your listing, the lead info will be sent to the email address associated with the agent’s Real Estate Agent Directory (READ) account. You can check e-mail settings by visiting https://dashboard.homeasap.com. Also, be sure that the “Receive Customer E-mails” toggle is set to “Yes.”
If these settings are correct, you may also want to check your junk mail folder. Be sure that you allow messages from the Real Estate Agent Directory and Home ASAP.
I can't see my listings in featured listings tab.
Agent Parameter Entered Incorrectly
Each shortcode contains an agent parameter that tells which agent’s Real Estate Agent Directory profile to use when importing listings. If the value for this parameter is entered incorrectly, listings will not display correctly.
To fix, generate a new shortcode using the agent search tool found on the IDX Home Search settings page. Then replace the incorrect shortcode with the newly generated shortcode.
MLS Info Missing From READ Profile
IDX Home Search uses the MLS information entered into the Real Estate Agent Directory (READ) profile for the agent. If that info is missing or incorrect, listings will not display correctly.
You can check the MLS info on file through the agent’s READ profile at https://dashboard.homeasap.com. Our team typically reaches out during the MLS approval process to verify MLS information, as well.
To change or update MLS or broker information, please e-mail us at [email protected].
Incorrect Shortcode Syntax
WordPress requires a specific format for the shortcode to work correctly. Common errors include missing brackets and incorrectly typed shortcode names. Also, ensure that the values for parameters are enclosed in quotes.
No Current Listings
It’s common for agents not to carry any listings at certain times of the year. Many agents choose to supplement their own listings with listings from their broker or office. To include office listings, you will need to add an MLS Office ID to the agent’s account on the Real Estate Agent Directory.
FAQs
Where is the button for the search field?
When using the search box only embed option, no submit button will be displayed. The search uses the auto-complete feature to initiate the search instead. As the location is typed into the search field, a list of locations should appear. Users can then click the desired location to begin their search.
How will agents receive leads from listings?
Lead capture forms are built directly into the listing information pages. When a visitor completes a form to schedule a showing or ask a question, an e-mail is sent to the e-mail used to set up the agent’s Real Estate Agent Directory (READ) profile.
Leads are also stored on a leads tracker available in the READ dashboard. This dashboard can be accessed at https://dashboard.homeasap.com/Directory/Leads.
Why does the agent need a Real Estate Agent Directory account?
IDX Home Search connects with the Real Estate Agent Directory (READ) to pull the information needed to keep listing information up to date.
What is the Real Estate Agent Directory?
The [Real Estate Agent Directory [(READ)] is the largest directory of its kind on Facebook. Over 600,000 real estate agents have already taken advantage of free benefits like:
- Agent Profile – Make your agent profile searchable to homebuyers and sellers on the largest social network.
- Featured Listings – Expand the reach of listings by linking them to your READ profile.
- Referral Matching – Easily find referral partners that match the location, expertise, and credential criteria you specify.
- Exclusive Facebook Groups – Collaborate with agents from around the country to ask questions, share insights, and more.
- Page Poster – Easily post engaging, relevant content to a Facebook page with just a click
READ membership is completely free for agents and can be set up third-parties like developers and marketing teams.
Can a third-party such as a developer create a Real Estate Agent Directory account for the agent?
Yes, you can make an account for someone else using the agent’s e-mail address. DO NOT use the “Sign Up with Facebook” option if signing up for someone else.
To connect to listings, you will also need the name of the agent’s MLS and MLS Agent ID number. If you would like to display other listings from an office, you will also need the MLS Office ID.
Jacksonville, FL 32256